Hiking trails offer some of the most breathtaking landscapes you can capture from the air. Ridge lines, valley overlooks, alpine lakes, and forest canopies all reveal their full grandeur only when seen from above. But taking a drone into mountain terrain introduces a specific set of challenges that flat-field flying never prepares you for: thinner air, unpredictable wind, limited landing spots, and signal obstacles everywhere.
This guide walks through the practical realities of using the Skyrover X1 for hiking photography, based on extensive trail testing across varied terrain and conditions. Whether you are a weekend hiker looking to level up your trail videos or a content creator planning a multi-day backcountry shoot, these strategies will help you come back with the shots you envision.
Pre-Flight Planning: The Most Important Step
The difference between a successful mountain drone session and a frustrating one is almost always decided before you leave the trailhead. Planning for aerial photography on a hike involves considerations that go well beyond checking the weather.
Scouting Your Location
Before heading out, study your trail on a topographic map or an app like AllTrails. Identify potential launch points: open clearings, wide trail sections, or ridge-top meadows where you have enough space to take off and land safely. Mountain trails are often narrow and lined with trees, so natural clearings become your primary launch sites.
Pay attention to elevation gain. If your trail climbs 1,000 meters over 5 km, you need to plan your flight batteries around multiple short sessions rather than one long flight, because carrying a drone up a mountain is tiring enough without wasting flights on mediocre locations.
Weather Assessment
Mountain weather changes faster than almost any other environment. A clear morning can turn into a windy, overcast afternoon within hours. Before your hike, check:
- Wind speed at summit elevation: Mountain summits routinely experience winds 2-3x stronger than at the trailhead. The Skyrover X1 handles Level 5 winds (17-21 mph), but gusts at exposed ridge lines can exceed this.
- Cloud ceiling: If clouds are below summit level, your drone footage will be entirely gray and featureless. Check the cloud base altitude against your planned shooting elevation.
- Temperature: Battery chemistry degrades in cold temperatures. At temperatures below 10 degrees Celsius (50 degrees Fahrenheit), expect a 10-15% reduction in flight time. Below freezing, the reduction can reach 25-30%.
- Precipitation forecast: Even light mist can affect camera lenses and interfere with obstacle avoidance sensors. Plan your flights for dry windows.
Battery Strategy for Trail Photography
On a hike, you cannot just pop inside to recharge. Every flight minute counts, so plan your battery allocation deliberately. The Skyrover X1 delivers approximately 32 minutes of flight time in standard conditions. In mountain terrain with wind, recording, and AI tracking active, expect a realistic 25-28 minutes per battery.
For a full-day hike with aerial photography as a primary goal, three batteries is the practical minimum. Here is a suggested allocation strategy:
- Battery 1 (morning): Use for trailhead vicinity shots and testing conditions. Fly conservatively to gauge wind patterns at altitude.
- Battery 2 (midday/summit): Reserve for your highest-value shots at the most scenic locations. This is where you want maximum flight time for panoramic captures.
- Battery 3 (afternoon/descent): Use for golden-hour shots on the way down, when lighting is typically at its best.
Keep spare batteries in an inner jacket pocket to keep them warm, especially in cold weather. A battery that reads 100% on the ground at 5 degrees Celsius may drop to 70% within minutes of takeoff if it was stored in a cold outer pocket.
Signal Challenges in Mountain Terrain
The Skyrover X1 advertises a 15 km transmission range, but that figure assumes ideal line-of-sight conditions with no interference. In mountain terrain, your effective range will be considerably shorter, and understanding why helps you adapt your flying strategy.
What Blocks Your Signal
The 5.8 GHz signal used by most consumer drones, including the X1, operates at a frequency that does not bend around obstacles. It is essentially line-of-sight, meaning anything solid between the controller and the drone will degrade or sever the connection.
- Rock faces and ridgelines: A mountain between you and the drone is an immediate signal barrier. Even a small ridge can reduce range to under 1 km.
- Dense forest canopy: Wet leaves are particularly effective at absorbing 5.8 GHz signals. In heavy forest, expect range to drop to 3-5 km even with direct line of sight.
- Other 5.8 GHz devices: Popular hiking spots near urban areas often have significant RF interference from Wi-Fi routers and other drones.
Practical Signal Strategies
Position yourself at the highest accessible point near your launch site. Even climbing a small knoll or standing on a rock outcrop can add 500 meters to your effective range. Orient your controller antenna vertically (perpendicular to the ground) for maximum signal strength, as most drone antennas radiate outward from the flat side of the antenna element.
If you are flying a panoramic sweep across a valley, position yourself on the same side as the drone's flight path rather than trying to transmit across the valley. The signal travels much more reliably over open air than through terrain.
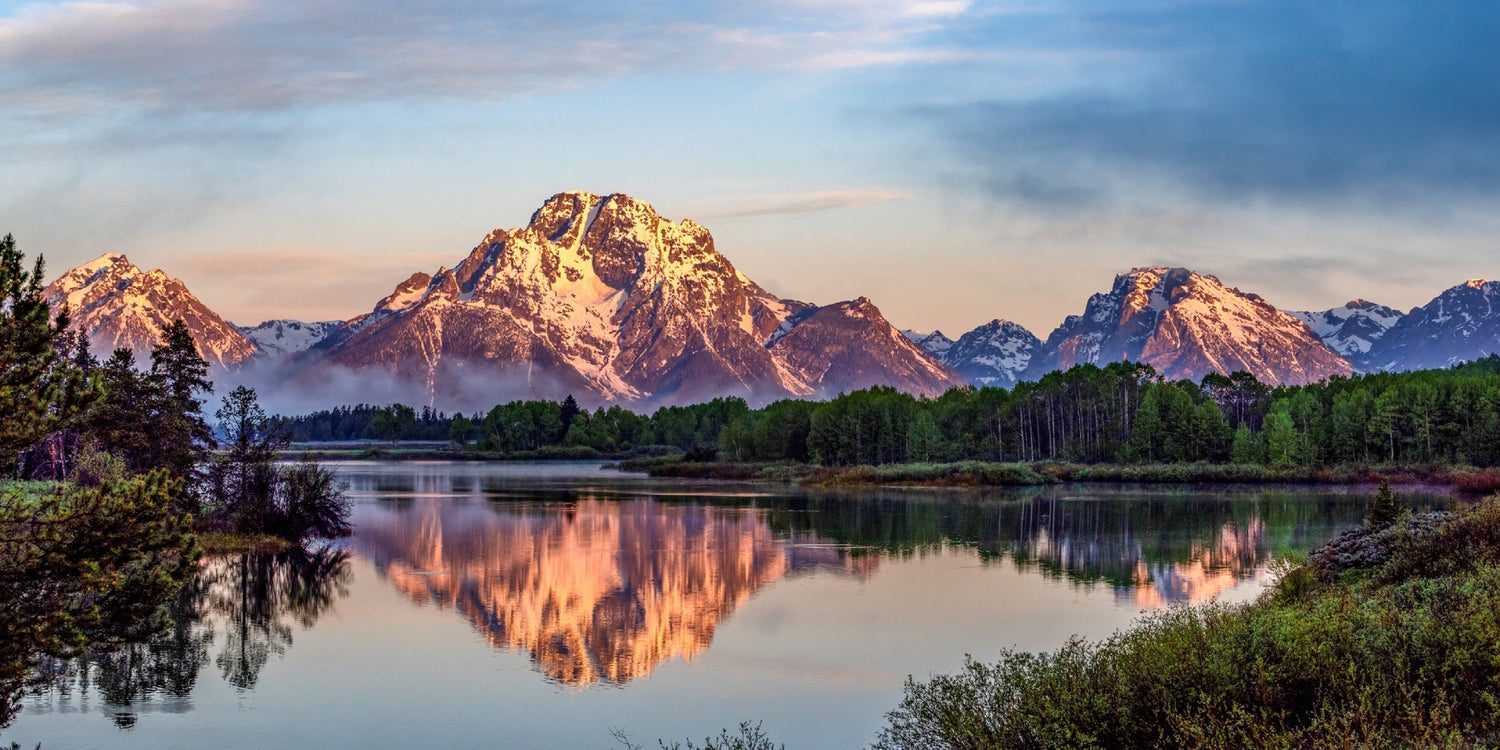
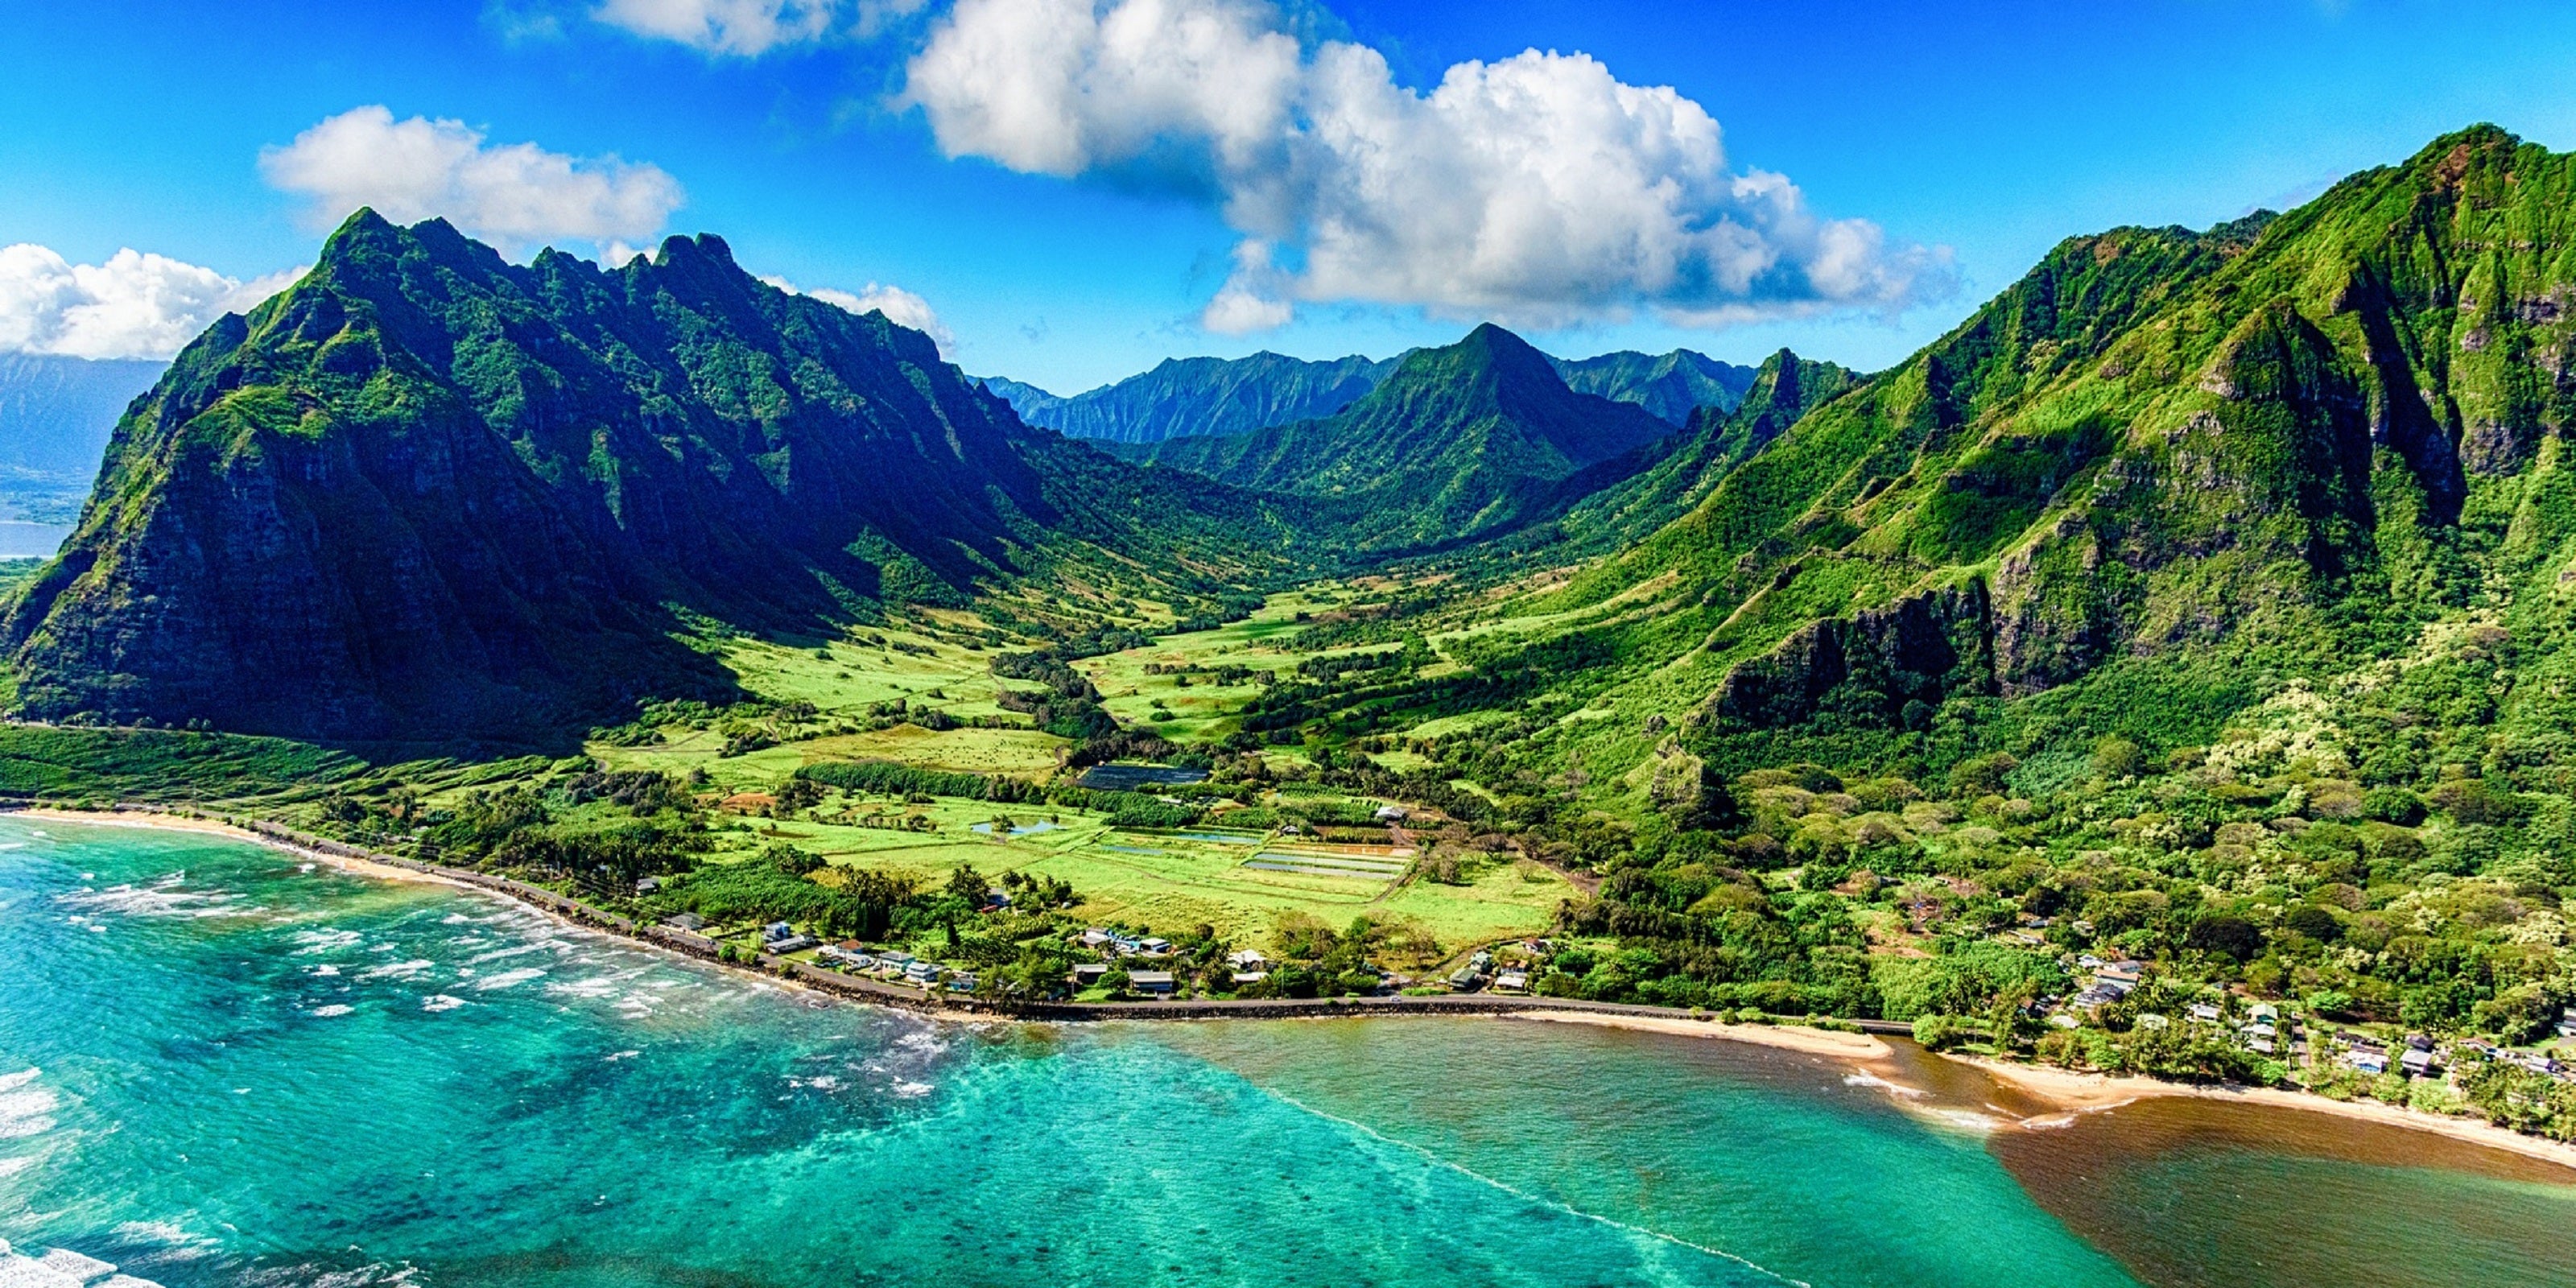
Panoramic Shooting Techniques for Mountain Landscapes
Mountain landscapes are arguably the most rewarding subjects for aerial panoramas because of the sheer scale and depth visible from altitude. Here are techniques specifically suited to trail environments.
Wide Panoramic Sweeps
For capturing the full sweep of a mountain range or valley:
- Launch from a ridge or high point with clear line of sight to the panorama you want to capture.
- Ascend to 50-80 meters above your launch point. This altitude provides enough perspective to see the landscape's grandeur without losing detail.
- Use the X1's orbit mode with a wide radius (30-50 meters) to create a smooth, sweeping motion across the landscape.
- Set recording to 4K/60fps so you have the option to slow the footage down in post for a more cinematic feel.
- Fly slowly. Mountain panoramas look best with gradual reveals, not rapid sweeps that give viewers no time to absorb the scale.
Reveal Shots from the Trail
One of the most impactful hiking drone shots is the reveal: the drone starts close to you on the trail, then rises and pans to show the landscape beyond. To execute this:
- Position the drone on the trail-facing side of a ridge or obstacle.
- Start recording at low altitude (2-5 meters).
- Slowly ascend while panning upward and outward.
- The landscape "reveals" itself as the drone clears the ridge line.
This technique leverages the X1's 360-degree obstacle avoidance, which is critical during the initial low-altitude phase when the drone is near rocks, trees, and uneven terrain.
Vertical 4K for Social Content
The X1 supports true 4K vertical video, which is increasingly important for social media content shot during hikes. When shooting vertical:
- Frame your subject (a peak, a waterfall, a person on the trail) in the lower third of the frame.
- Leave the upper two-thirds for sky and mountain context.
- Fly slow ascending movements to create a sense of scale that horizontal video cannot match on a phone screen.
Flight Challenges Specific to Mountain Terrain
Altitude and Air Density
At higher elevations, air density decreases, which means the drone's propellers generate less lift per revolution. The motors must spin faster to maintain the same altitude, which increases power consumption. Above 2,500 meters (8,200 feet) elevation, you may notice a 5-10% reduction in flight time compared to sea-level performance. The X1's motors are efficient enough to handle this without issues, but be aware that your batteries will drain slightly faster at altitude.
Thermals and Mountain Wind Patterns
Mountains create their own wind patterns. As the sun heats slopes, warm air rises (thermals), creating updrafts on sun-facing slopes and downdrafts on shaded sides. Ridge lines create venturi effects where wind accelerates as it squeezes over the top. These patterns mean wind conditions can change dramatically over just a few meters of lateral movement.
The X1's GPS hold system and 3-axis gimbal do an admirable job of compensating, but understanding mountain wind helps you avoid the worst of it. Fly during the calmer morning hours when possible, and be cautious around midday when thermal activity peaks.
Obstacle Avoidance in Natural Environments
The X1's 360-degree obstacle avoidance is designed for complex environments, but nature presents unique challenges. Tree branches, in particular, can be difficult for stereo vision systems because thin branches may not create enough contrast against the background for reliable detection. When flying near trees:
- Maintain at least 2 meters of clearance from dense branches.
- Fly slowly when navigating through partially forested areas.
- Keep the drone in line of sight when near obstacles, rather than relying solely on the avoidance system.
Safety and Etiquette on the Trail
Flying a drone on hiking trails comes with responsibilities beyond just keeping the drone safe.
- Respect other hikers: Not everyone wants to hear a drone buzzing while they are enjoying nature. Fly away from crowded trail sections, and avoid hovering near groups of people.
- Wildlife: Drones can disturb wildlife, especially nesting birds and grazing animals. Maintain at least 100 meters of distance from any animals you spot, and avoid flying directly over wildlife.
- Regulations: Check local regulations before flying. Many national parks and protected areas prohibit drone flights entirely. In the US, the National Park Service restricts drone use in all national parks without a special permit.
- Leave no trace: If your drone crashes and you cannot retrieve it, report it to the relevant land management agency.
Conclusion
Capturing hiking panoramas from the air is one of the most rewarding applications of a mini drone, and the Skyrover X1 is well-suited to the task. Its 1/1.32-inch sensor delivers image quality that holds up in varied mountain lighting, the 3-axis gimbal keeps footage smooth even in wind, and the 360-degree obstacle avoidance provides a safety net in complex terrain that would challenge any pilot.
Success comes down to preparation: plan your battery strategy, scout your launch points, understand mountain weather and wind patterns, and allocate your flight time to the locations that matter most. With the right approach, even a single day on the trail can produce aerial footage that captures the true scale and beauty of the landscape in a way that ground-level photography simply cannot.
Explore the Skyrover X1 for your next hiking adventure at www.skyroverdrone.com

Leave a comment
This site is protected by hCaptcha and the hCaptcha Privacy Policy and Terms of Service apply.